WebCashFlow: The Basics
Concept
The concept behind forecasting cashflow, whether using this application or any other, is predicting when money is going to be received and paid. It turns out that for many people this can be done with surprising accuracy. Income tends to be received weekly, 4-weekly or monthly and the amounts will be known within certain limits. Similarly a surprisingly large part of expenditure is periodic and also with predictable amounts; for example utility bills, council tax, subscriptions.
Let's get started with a simple example.
There are only two menu options you need to worry about to get started,
1. Cashflow Forecast
Which we will come to shortly, and
2. Scheduled Transactions
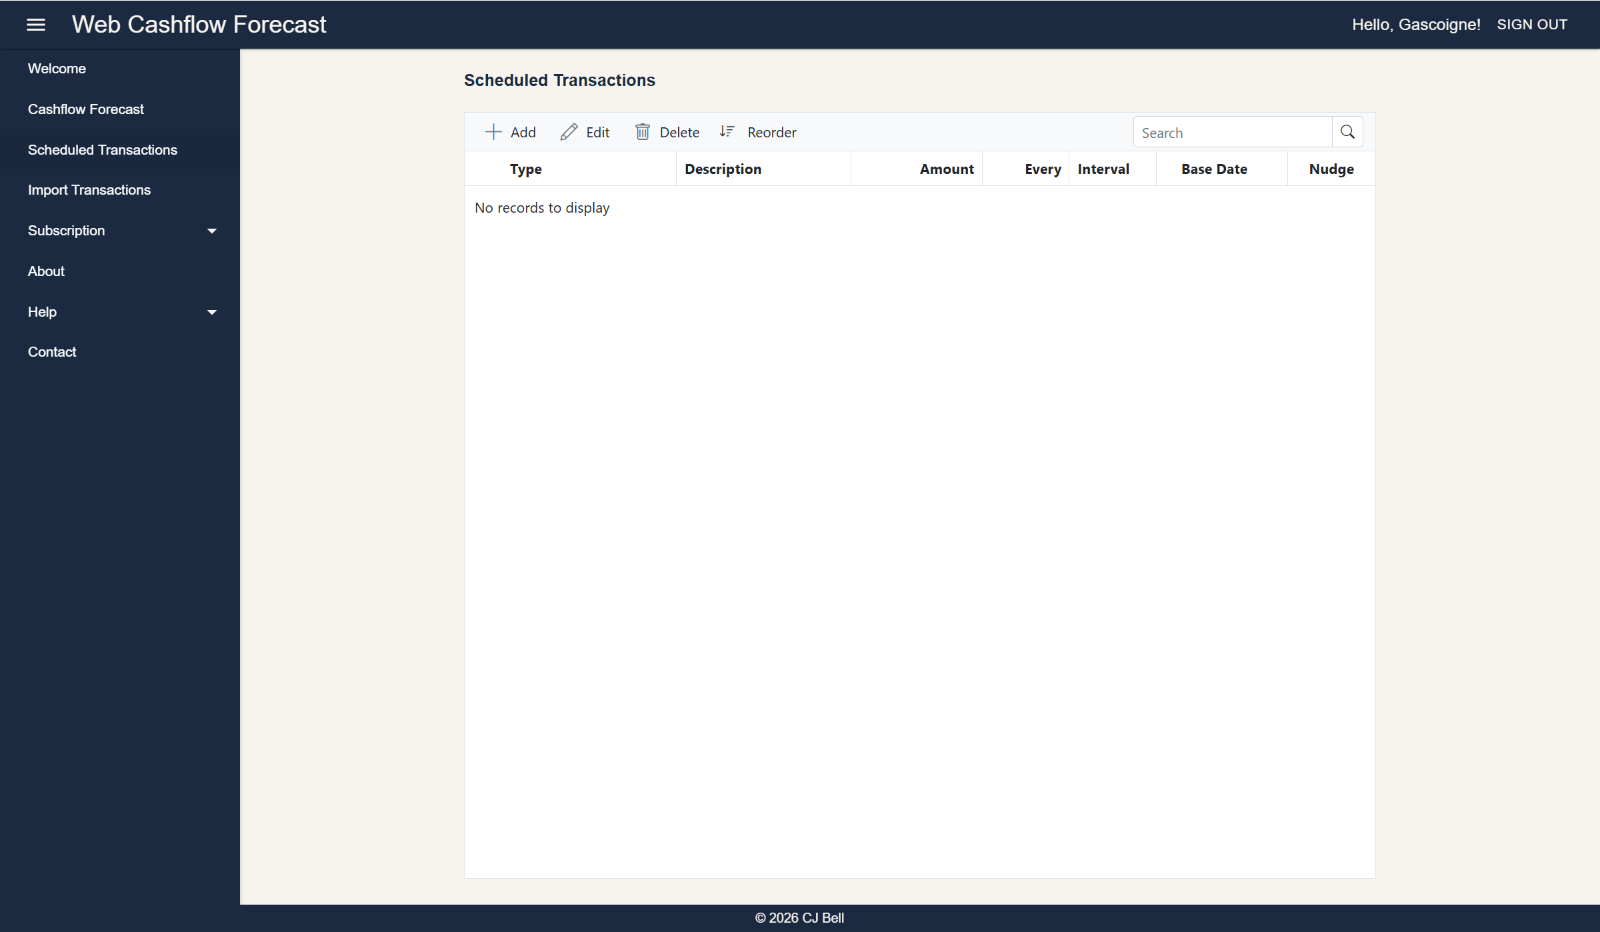
Select 'Scheduled Transactions' from the menu. You will be presented with this page:
Click to enlarge & Esc to close
Click the 'hamburger' menu icon to show the menu if it isn't visible. The Scheduled Transactions page is where you enter the transactions that you want to be included in your cashflow forecast. You can enter as many transactions as you like, and they will be included in the cashflow forecast when you run it. You can also edit, delete and reorder transactions on this page.
The toolbar at the top of the form has buttons for
- Add
- Edit
- Delete
- Reorder
as well as a Search box.
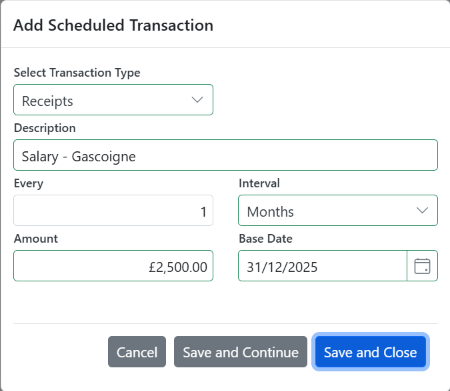
Click Add to add a new Scheduled Transaction and this dialog will open.
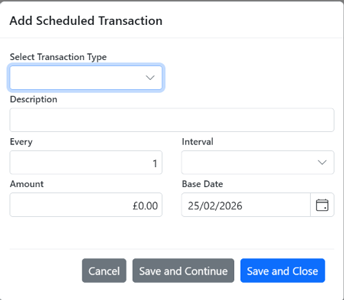
- Select a Transaction Type from the drop-down list. These are banking transaction types. All except 'Receipts' are payment types
- Enter a Description for the transaction, e.g. Salary, Mobile Phone, Electricity, etc.
- In Every enter the frequency of the receipt or payment. Typically this will be '1', but would be '7' for a transaction that recurs every 7 days, for example.
- Select an Interval from the drop-down list
- Years
- Months
- Days
- One-off
- Enter an Amount
- Enter a Base Date
- This is used by the application to calculate on which dates in the cashflow forecast window the transaction will fall. A good way to determine a 'Base Date' is to use the most recent date this transaction occurred. However, for 'One-off' transactions this must be in the future. For 'Intervals' other than 'One-Off' entering a 'Base Date' in the future will be the start date this transaction i.e. the date it first appears in the cashflow forecast.
Click Save and Close, or Save and Continue (if you wish to add further transactions), or Cancel to abandon the transaction.
A Base Date in the future will be the start date for that scheduled transaction. For example a transaction with a Monthly interval and a Base Date of, say, 10/10/2027, will not come into effect until the cashflow forecast period includes 10/10/2027.
Base dates with dates at the end of the month behave like this:
- Transactions dated 31st of the month will always be forecast to occur on the last day of the month.
- Transactions dated 30th of the month will always be forecast to occur on the 30th of the month, except February when they will be forecast to occur on February 28th (or February 29th in a leap year).
- Transactions dated 29th of the month will always be forecast to occur on the 29th of the month, except February when they will be forecast to occur on February 28th ( except in a leap year, when it will occur on the 29th February).
- Transactions dated 28th of the month will always be forecast to occur on the 28th of the month.
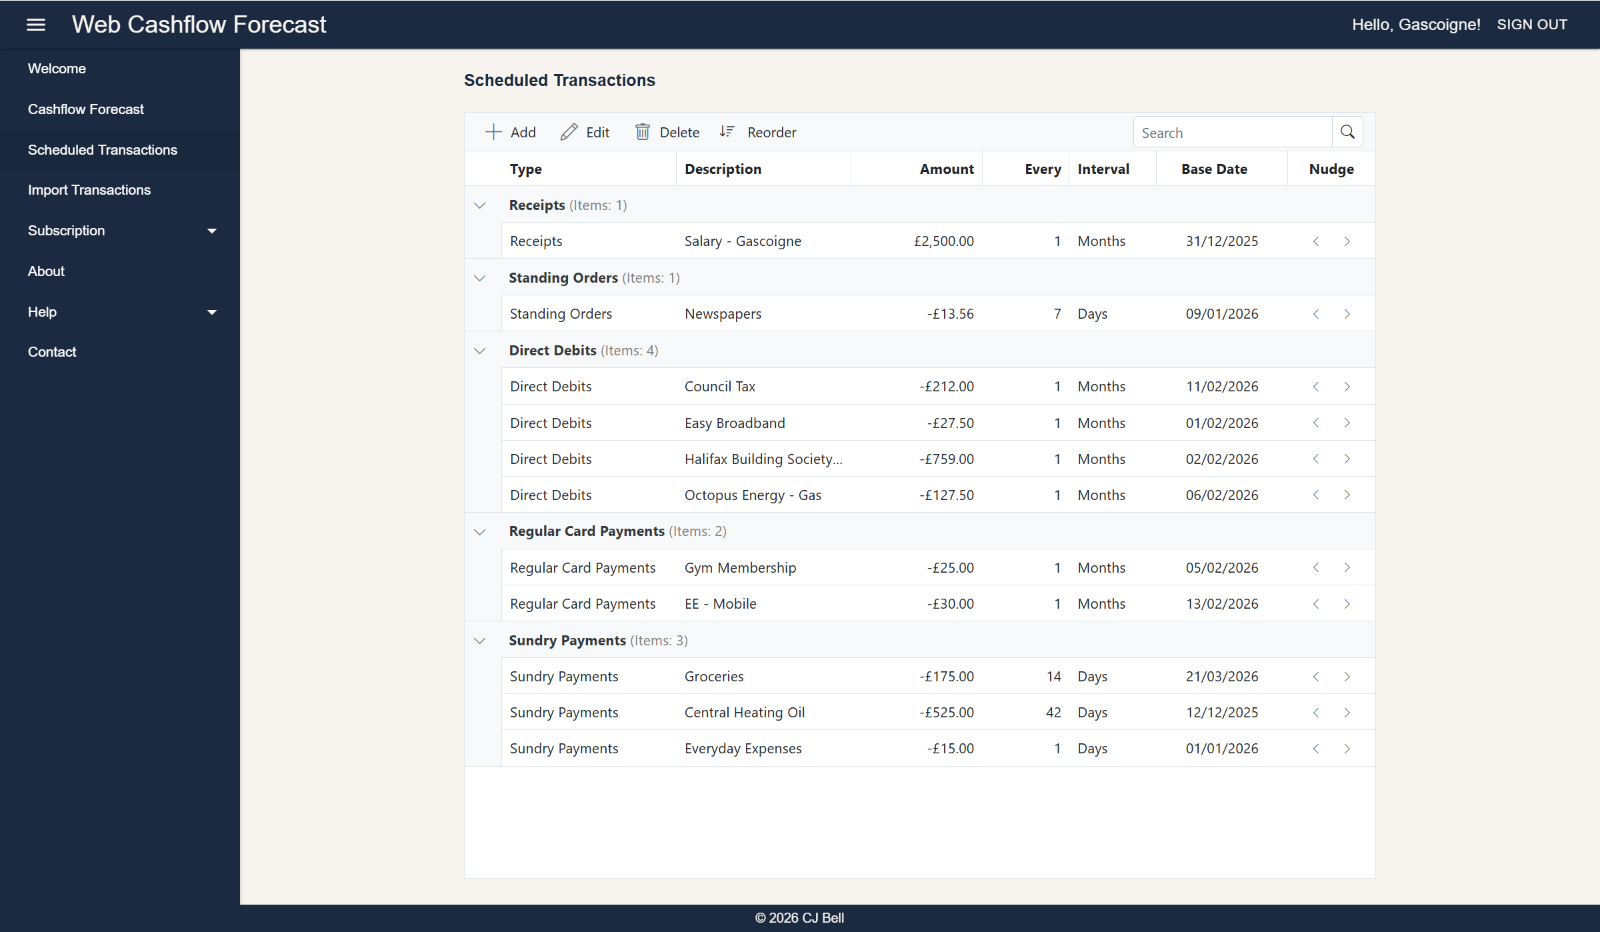
After entering a few Scheduled Transactions, the Scheduled Transactions summary will look similar to this:
Click to enlarge & Esc to close
Cashflow Forecast
Once your Scheduled Transactions have been entered, creating a Cashflow Forecast couldn't be easier. Simply:
- Select Cashflow Forecast from the menu. (If the menu isn't visible click the 'hamburger' menu icon).
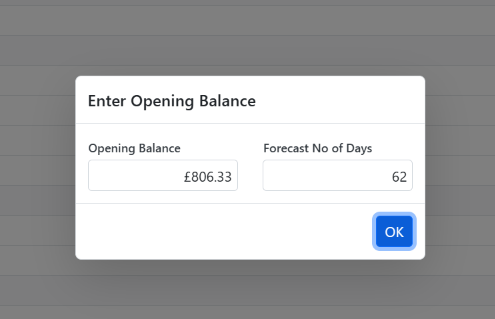
- A dialog form will be displayed.
- Enter your Opening Balance
- Enter the number of days you want to forecast, Forecast No of Days. This will default to 90, the maximum is 365 days.
- Click OK
Note: If you re-run Cashflow Forecast on the same day the app 'remembers' the Opening Balance to save you re-entering it.
A grid will be displayed showing your cashflow forecast. Receipts and positive balances are shown in green, payments and negative balances are shown in red.
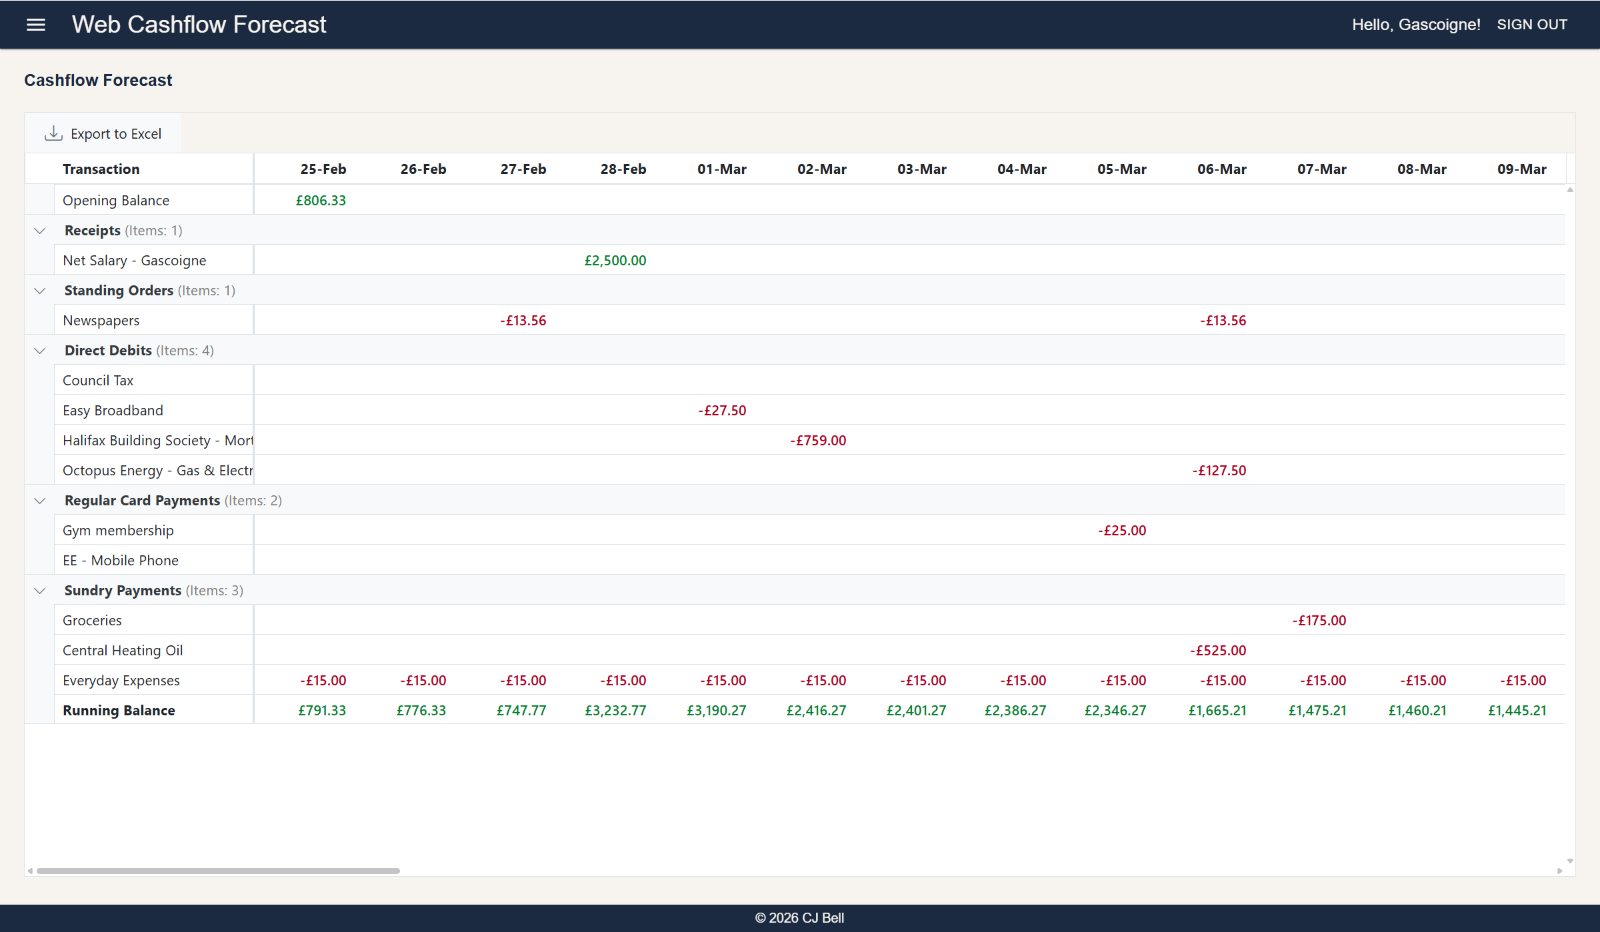
Click to enlarge & Esc to close
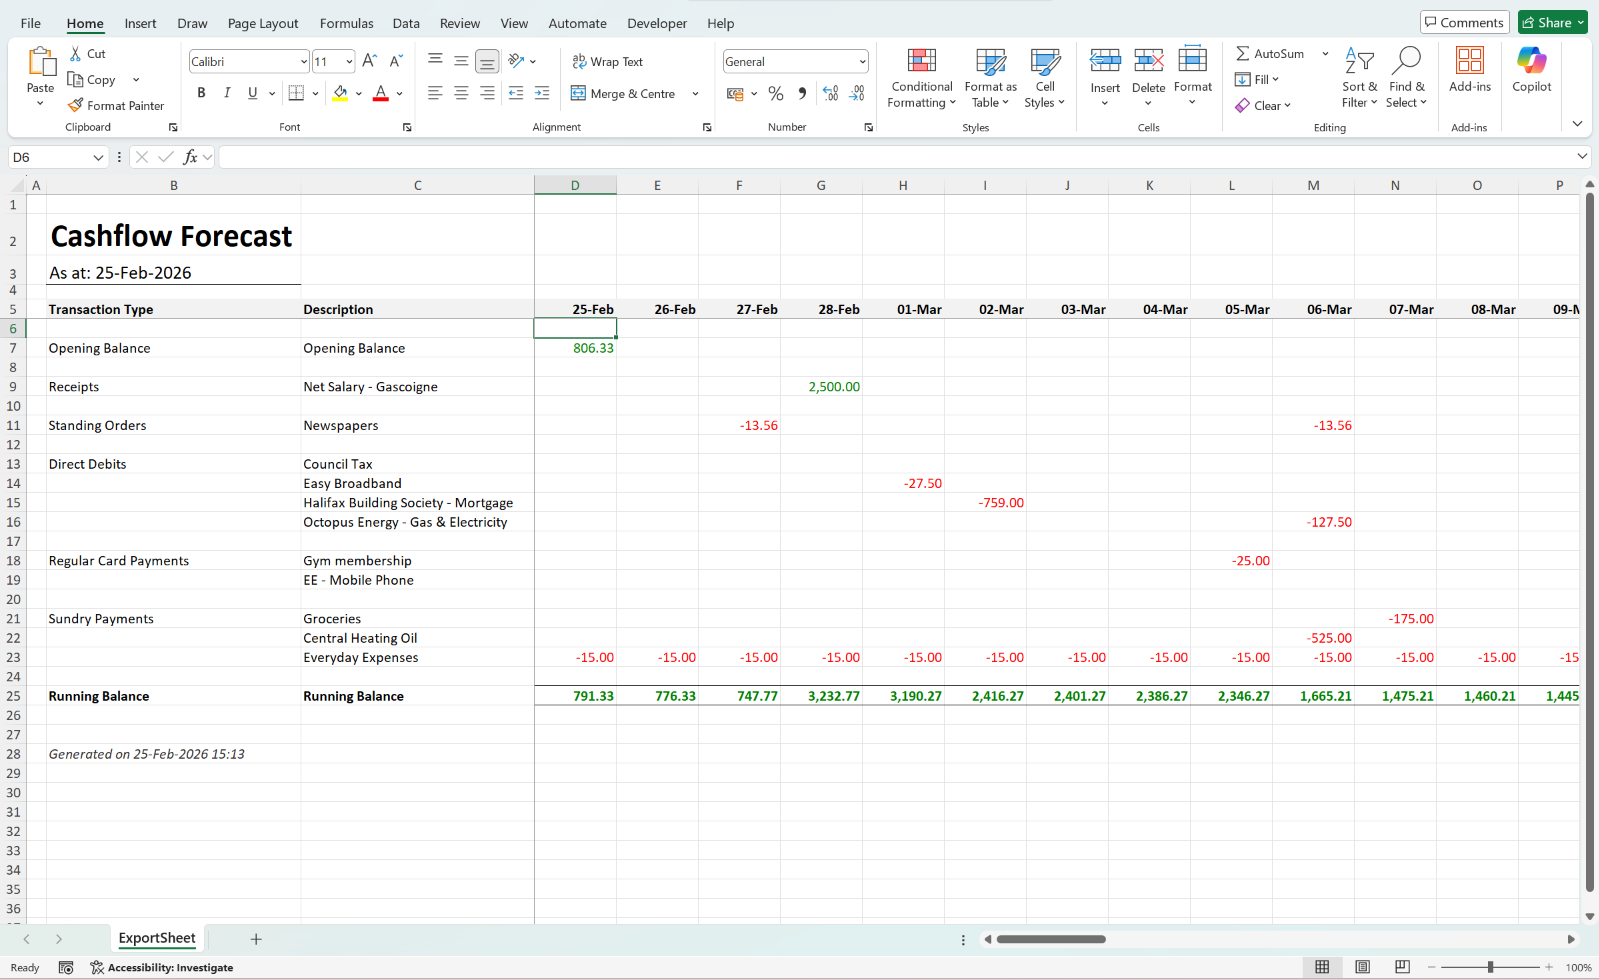
To export the cashflow forecast to Excel click the Export to Excel button at the top left of the grid. A file will be downloaded to your computer which can be opened and edited using Excel.
Click to enlarge & Esc to close
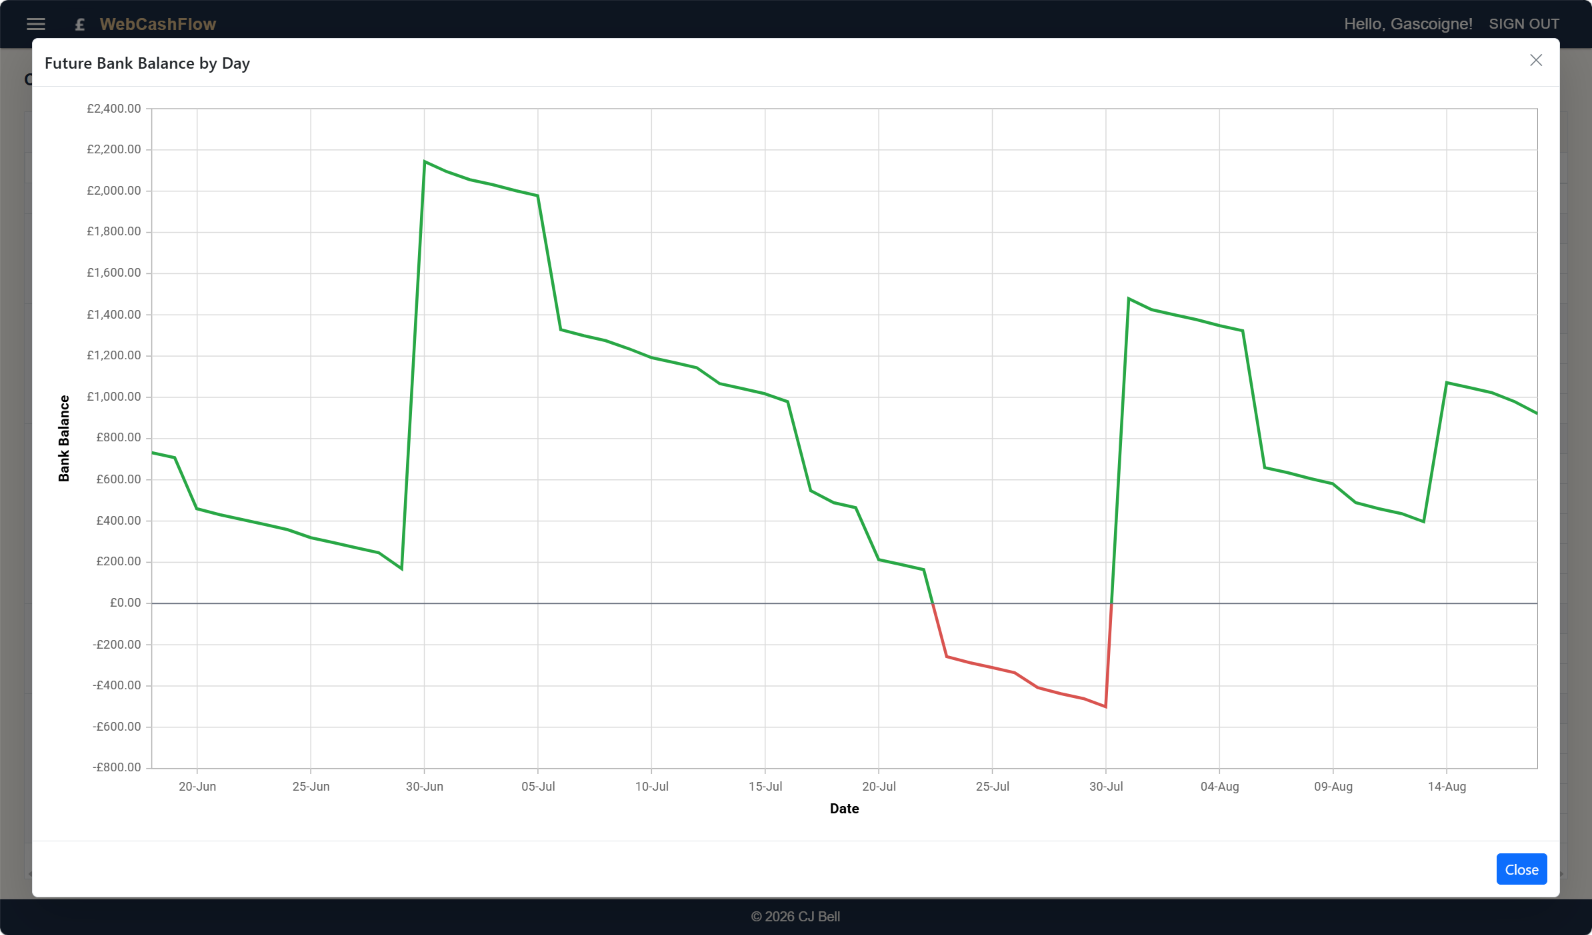
To visualise the cashflow forecast in a chart click the Display Chart button at the top left of the grid. A chart will be displayed showing your cashflow forecast. Receipts and positive balances are shown in green, payments and negative balances are shown in red.
The chart has the advantage that it compresses the date range so that all the data can be seen at a glance. The grid can be scrolled to see the data for each day, but the chart shows the overall picture.
Hovering over a point on the chart will display the date and balance for that day.
Click to enlarge & Esc to close
To watch a video on this subject click here: The Basics
Next
To start learn more about the application, please see In Depth